How to Ensure the Authenticity of Daily Maintenance Records for Air Supply Ceilings 1. Focus on the Core: The 3 Immutable Rules of GMP for “Authenticity” The record must be consistent with the actual operation – If not done, do not write; if done, write it. The record must be filled out immediately upon occurrence – No backdating, no filling in later, no fabrication. Who operated, who recorded, who signed – No proxy signatures, no unauthorized signatures. 2. 7 Practical Measures to Ensure Authenticity 1. Must be recorded immediately on-site Measure pressure difference → Record immediately Cleaning completed → Record immediately Check completed → Sign immediately Prohibited: Finish and then fill in uniformly, fill in at the office later, fabricate 2. Prohibit proxy filling, proxy signing, proxy copying Who performs the maintenance, who fills in with their own hand / personal account Signature must be the person’s own Prohibited: “Help me sign” “Shift leader signs uniformly” 3. Prohibit pre-writing, post-filling, batch fabrication Do not allow writing records for several days in a row Do not allow completing all records at the end of the month If there is a missed record, only note: “Did not record in time, have verified
I. First, ensure the completeness: The record must fully include the 6 types of content (missing any one makes it incomplete) Basic information is complete Equipment name, position number, location of the clean area, grade (A/B/C/D) Date, start/end time Operator, reviewer Maintenance items are complete Fan operating status (abnormal noise, vibration, temperature) Dampers cleaning, installation, sealing Initial/middle/high efficiency filter pressure difference Filter appearance, leakage, sealing condition Exhaust ceiling frame, ceiling sealing Data record is complete Pressure difference: initial, current, final resistance judgment Instrumentation number, calibration validity period Data comparison before and after maintenance Abnormal situations are complete Are there any abnormalities? Abnormal description Initial cause judgment Treatment measures Verification and closed-loop completeness Re-measurement data after treatment Has it returned to normal? Has deviation/change been opened? Signature and review completeness Operator’s signature Reviewer’s signature Auditor’s signature II. Ensure the completeness of 5 execution methods (directly follow the on-site procedures) 1. Use standardized, check-mark style templates, no freehand writing allowed All items should be fixed as check marks + fill-in, do not just write “normal”. The template should indicate: This item is mandatory, cannot be blank. One page covers all content to avoid scattered and lost pages. 2. Execute “Do one, record
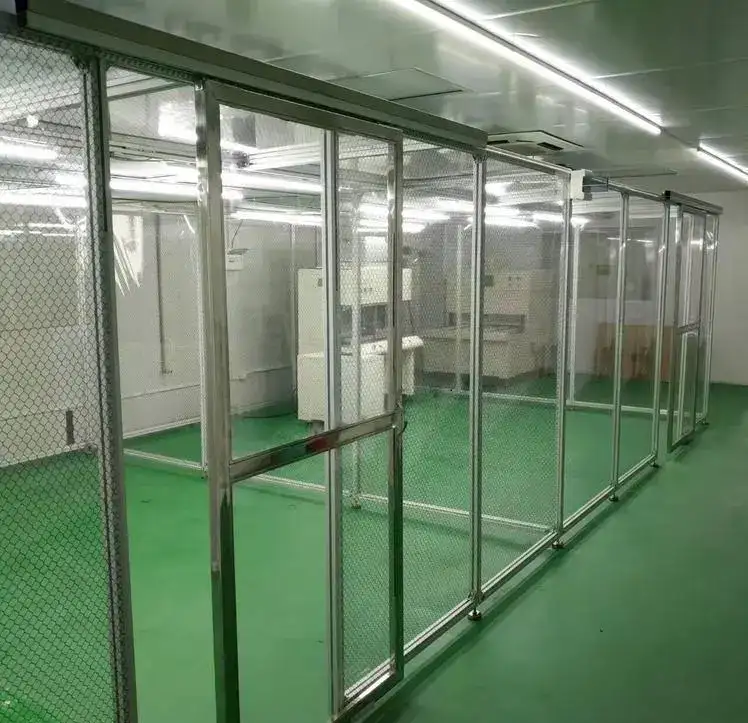
Main structure installation steps of the clean room (general standard version) I. Preparations Site cleaning: The ground should be clean, free of debris and water accumulation. Laying out and positioning: Use a tachymeter / laser level to mark the positions of the columns. Determine the length and width of the clean room, the direction of entry and exit, and the layout of the FFU. Material inspection: All the materials, such as profiles, angle pieces, screws, anchor bolts, and expansion bolts, should be complete and undamaged. II. Formal installation steps 1. Install the anchor base Drill holes at the marked points of the columns → Insert expansion bolts → Fix the anchor base. Level the base to ensure that all bases are of the same height and level. 2. Assemble the bottom frame Connect the bottom cross and longitudinal aluminum profiles with angle pieces. Place it on the anchor base, initially lock it, do not tighten it completely, to facilitate subsequent adjustments. Use a laser level to check: Square (equal diagonals) Level (uniform height around) 3. Install the columns Connect the columns with the corner pieces of the bottom frame, stand them vertically. Check the verticality with a level, deviation ≤
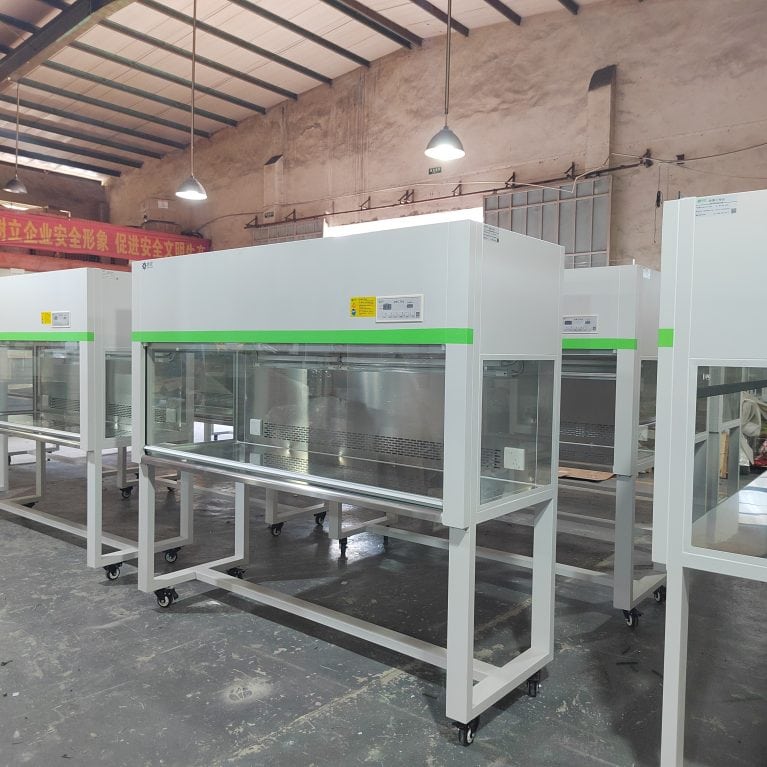
Here is a set of general, standardized, and directly applicable installation steps for ultra-clean workbench high-efficiency filters, suitable for both horizontal flow and vertical duct systems, applicable to pharmaceutical factories and laboratories. Installation Steps for Ultra-Clean Workbench High-Efficiency Filters I. Preparation Turn off the power of the ultra-clean workbench and unplug the plug. Prepare the new high-efficiency filter: Check the size, rated air volume, efficiency grade (H13/H14), and inspect for no damage or deformation. Prepare tools: Phillips screwdriver, clean dust-free cloth, 75% ethanol, sealing rubber strips (if aging, consider replacing them together). Clean the operation area to reduce dust. II. Disassembly of the Old High-Efficiency Filter Open the rear/top access cover or outlet decoration cover of the ultra-clean workbench. Loosen the fixing strips/screws of the high-efficiency filter (it is recommended to loosen diagonally to avoid deformation). Gently remove the old high-efficiency filter, do not hit it hard to prevent secondary dust contamination. Wet the inside of the box, the air duct, the sealing groove, and the strips with 75% ethanol, and thoroughly clean. III. Installation of the New High-Efficiency Filter Confirm the air flow direction: The arrow on the outer frame of the filter must point to the outflow side
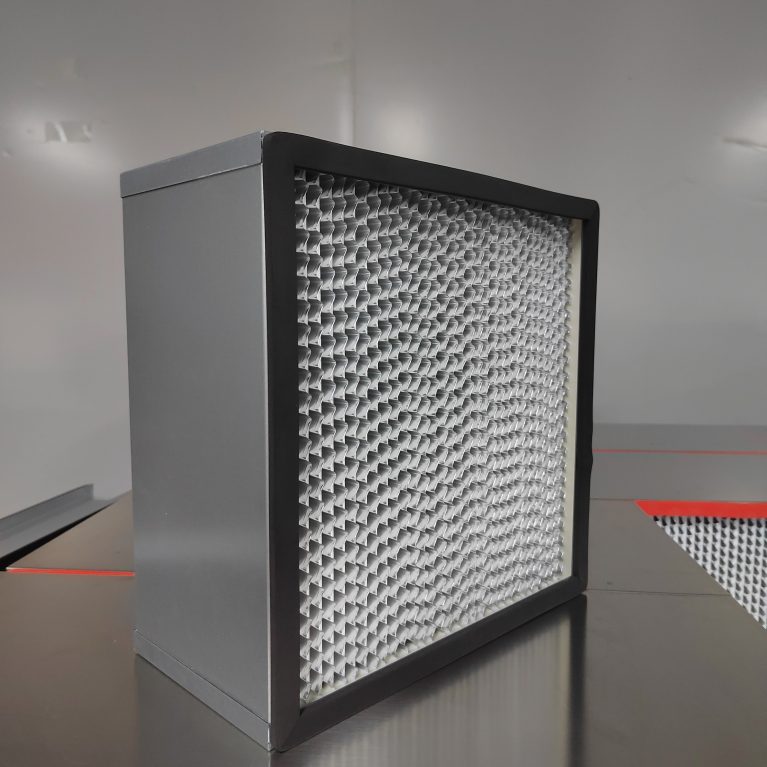
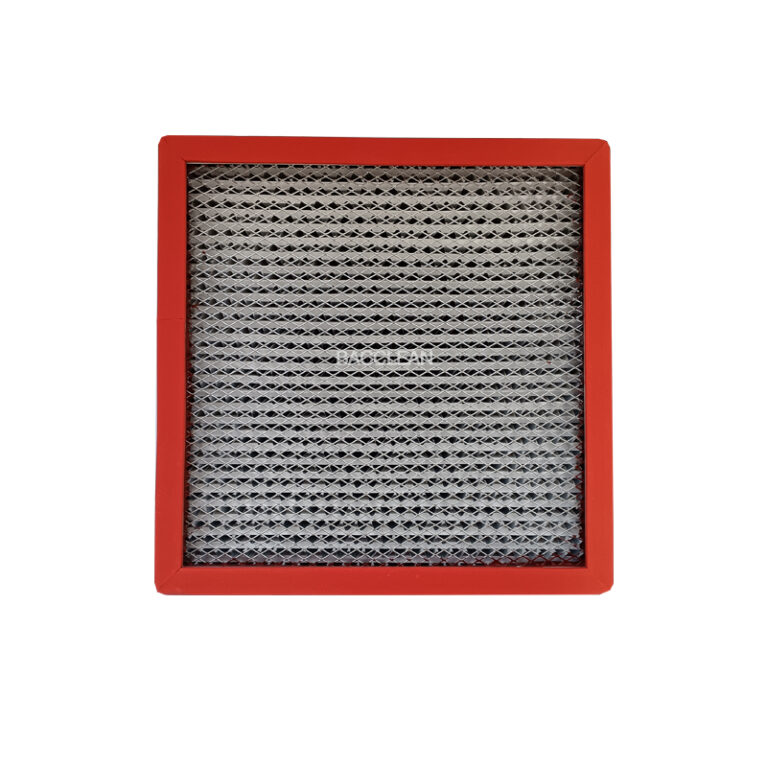
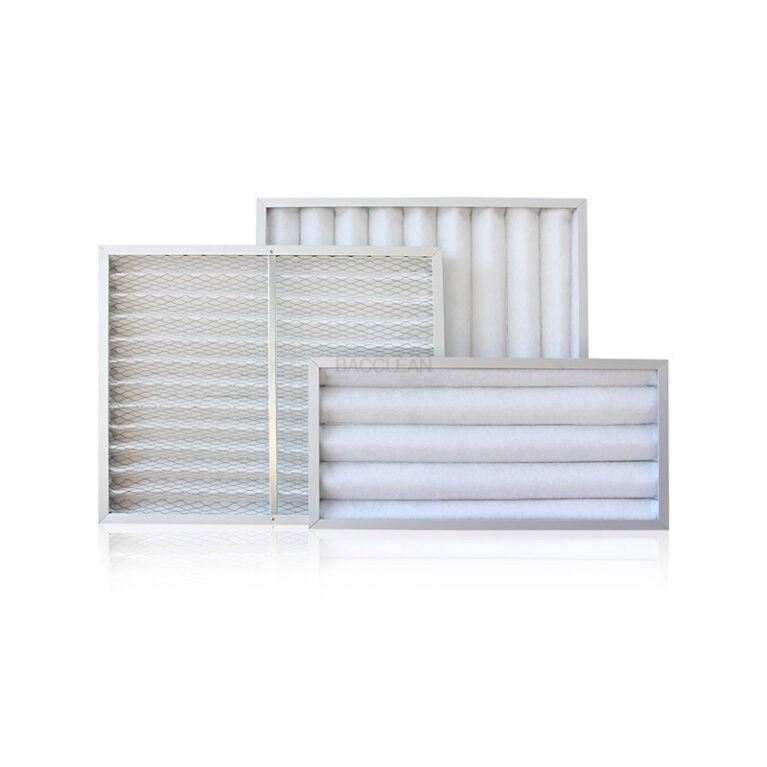
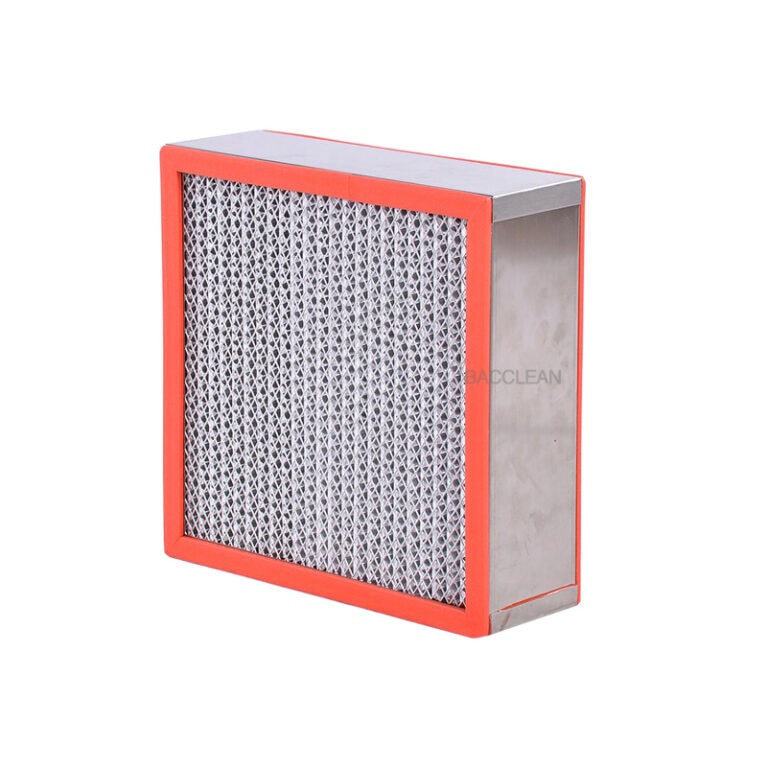
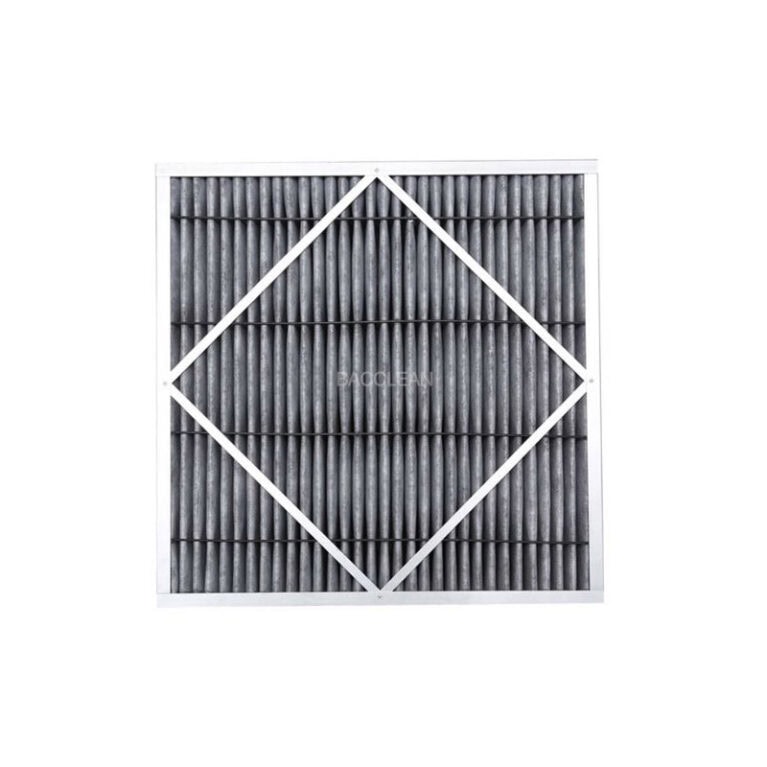
Paper partition, aluminum partition air filters – Comparison of application fields Core differences: Paper partitions are mainly used in normal temperature, clean, and conventional environments; aluminum partitions are mainly used in high temperature, high humidity, high requirements, and harsh working conditions. I. Paper partition high-efficiency filter – Applicable fields Characteristics: Normal temperature, clean, dry, cost-sensitive, not suitable for high temperature and high humidity. Electronic industry Semiconductor, electronic workshops, SMT workshops, ordinary clean rooms Ordinary clean rooms & laboratories General physical and chemical laboratories, testing rooms, clean workstations Civil / commercial ventilation Office buildings, shopping malls, hotels, hospital general wards, auxiliary areas of operating rooms Food and beverage (non-high-temperature sterilization sections) Ordinary packaging workshops, ingredient clean areas General industrial air conditioning terminal Air purification systems with no extreme requirements for temperature and humidity Summary in one sentence: Clean environment, normal temperature, dry, and seeking cost-effectiveness. II. Aluminum partition high-efficiency filter – Applicable fields Characteristics: Resistant to high temperature, high humidity, vibration, stable structure, longer lifespan. Pharmaceutical industry (GMP key areas) Aseptic workshops, freeze-drying machines, tunnel ovens, sterilization workshops, laminar operating rooms High-level clean areas in hospitals Hundred-level / thousand-level operating rooms, ICU, aseptic pharmacies, central supply rooms High-temperature clean sections Baking,
The regular replacement cycle for the HEPA filters in the ultra-clean workstation: 1 to 3 years. The cycle varies greatly depending on the specific scenario. I will clearly explain it to you by industry to facilitate your record-keeping or SOP creation. I. General Universal Cycle General laboratories and electronic workshops: Replace once every 2 to 3 years High dust levels in the environment and frequent use: Replace every 1 to 2 years Clean environment and low usage frequency: Can be up to 3 years II. More Precise Reference by Industry Ordinary teaching / research laboratories: 24 to 36 months Food, cosmetics clean workshops: 18 to 24 months Pharmaceutical factories, GMP sterile rooms, biosafety laboratories: 12 to 24 months (Many enterprises directly replace once a year to avoid audit risks) III. Key Factors Affecting Replacement Cycle Whether the primary filter is cleaned / replaced on time If the primary filter gets dirty and is not dealt with, the efficiency will clog very quickly, and the lifespan will be halved. Dust level in the environment If there are grinding, crushing, mixing, dust-producing processes nearby → The lifespan of the efficiency will be significantly shortened. Daily operating time 24-hour operation vs. 2 hours

Here is a set of methods for inspecting the leak of ultra-clean workbench high-efficiency filters that are applicable to both pharmaceutical factories and laboratories, and can be directly incorporated into the SOP. The focus is on the most commonly used and compliant PAO method for leak detection, which is simple and easy to understand and can be performed on-site. I. Applicable Standards Commonly used in the pharmaceutical / GMP field: ISO 14644-3, GB/T 25915 Core: Check whether the high-efficiency filter, the filter paper itself, and the frame seal are leaking II. Most Common Method: PAO Aerosol Leak Detection Method 1. Required Tools PAO aerosol generator Aerosol photometer (leak detector) Clean gloves, alcohol 2. Basic Principle Upstream dust generation: Introduce PAO aerosol to the inlet side of the high-efficiency filter Downstream scanning: Use the photometer to scan the outlet side Exceeding the standard → Leakage is determined 3. Operating Steps (Special for Ultra-clean Workstations) Start the ultra-clean fan and let it run for ≥ 10 minutes. The airflow should be stable. Upstream dust generation: Place the nozzle of the PAO generator on the inlet side of the high-efficiency filter (generally on the top / rear), allowing the aerosol to evenly enter
Determining whether the pre-filter (primary or secondary) needs to be replaced is quite simple. Just remember the 4 criteria and you can make the decision by observing and testing on-site without having to guess. 1. Check the pressure difference (the most accurate and standard method) This is the most common method used in HVAC and cleanroom systems: When installing, record the initial pressure difference. If the pressure difference reaches twice the initial pressure difference, it’s time to replace it. Common experience values (for quick judgment only): Primary filter: Final resistance 90-150 Pa Secondary filter: Final resistance 150-250 Pa As long as the pressure difference reaches this level, regardless of whether it’s dirty or not, it is recommended to replace it. Otherwise, the lifespan of the subsequent high-efficiency filter will be significantly shortened. 2. Check the appearance (the most intuitive) Without using instruments, you can also make the judgment: The filter material is obviously blackened, yellowed, or covered with dust The filter screen is deformed, collapsed, or bulging The frame, sealing area has chips, damage, or air leakage The surface has mold spots, water stains, or corrosion If any of these conditions occur, replace it immediately. 3. Feel the wind speed
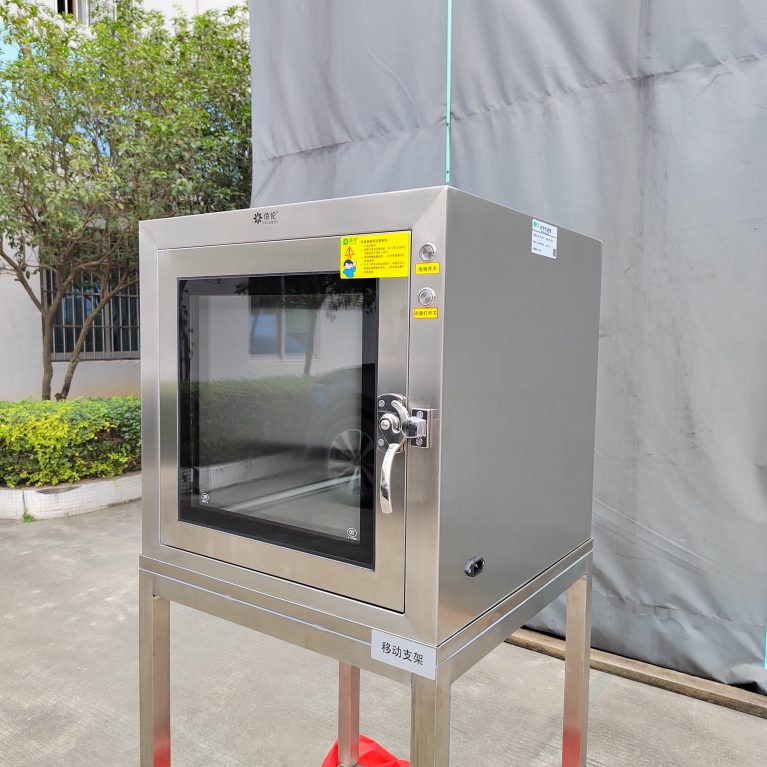
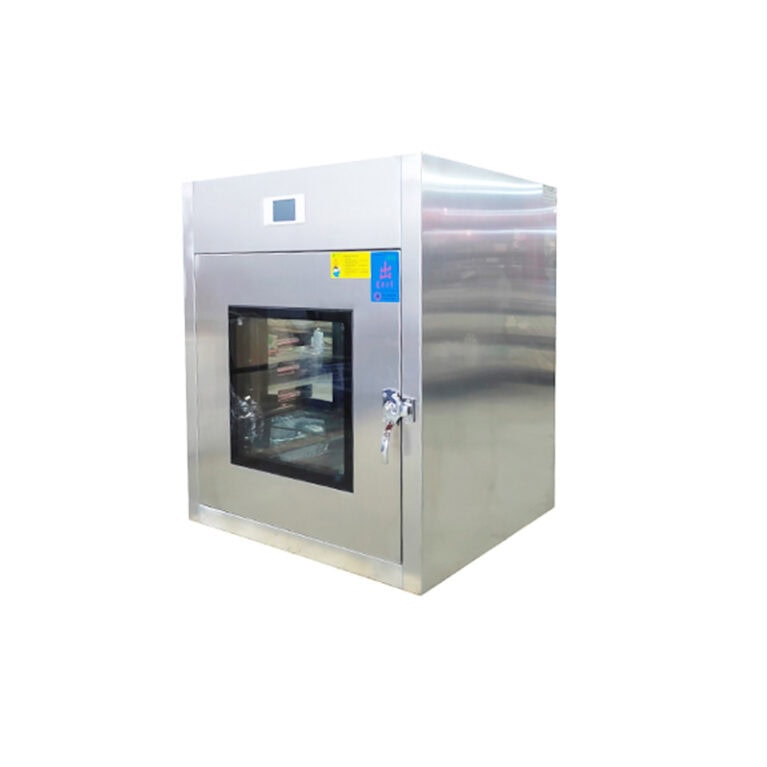
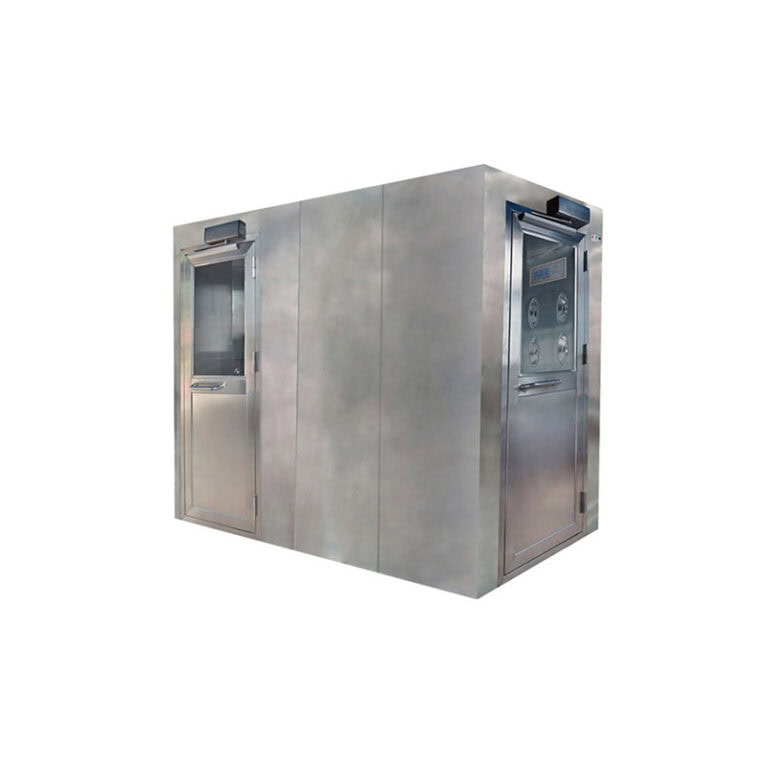
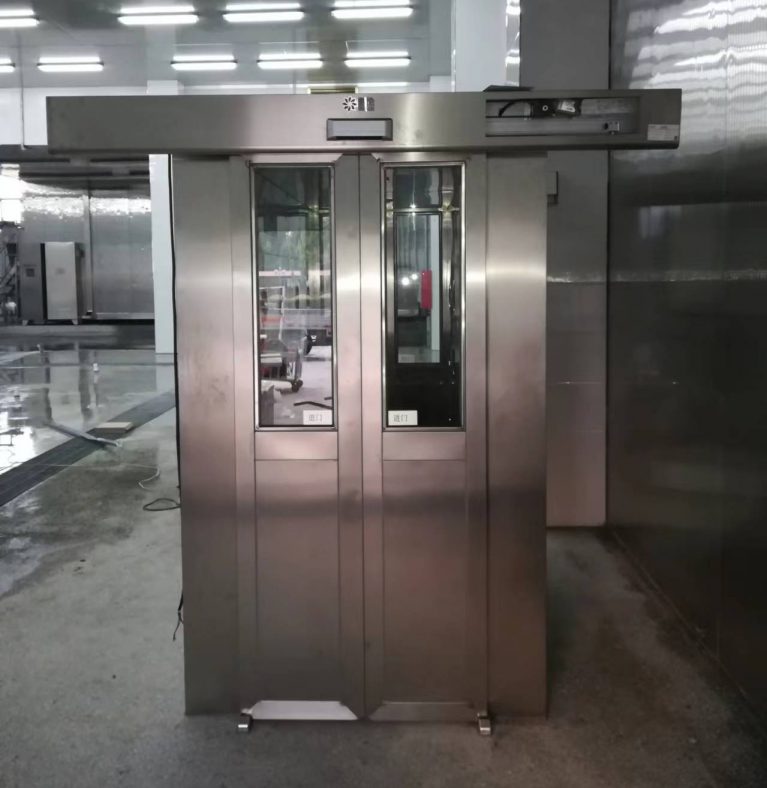
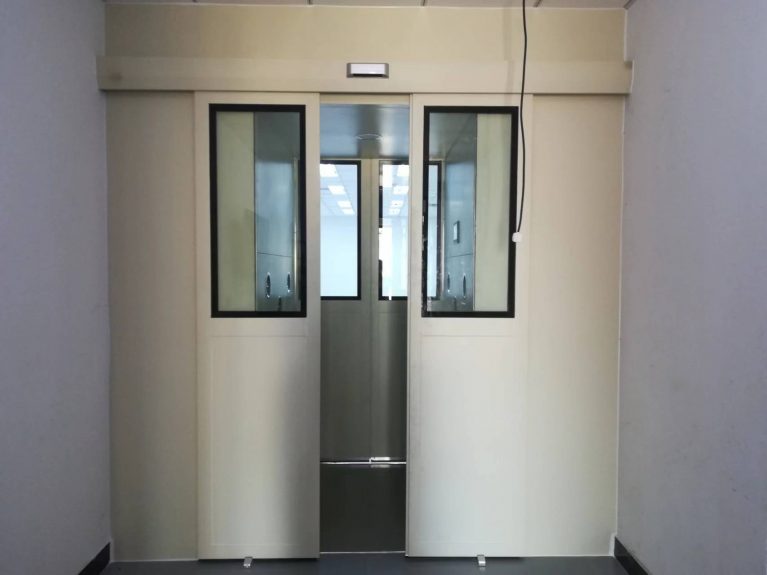
I. Installation Precautions (Key Points) Location Selection Install it within the partition between the clean area and the non-clean area. Avoid placing it close to dust-producing, damp, or highly-vibrating equipment. Reserve maintenance space to facilitate the replacement of high-efficiency filters, lamps, and wiring in the future. Wall Hole Opening and Fixation The opening size should be slightly larger than the outer frame of the transfer window. Leave a 10-20mm gap around it. Fix it firmly with expansion bolts. The box must be level and vertical to avoid door deformation and poor closure. Sealing is of utmost importance (core for preventing contamination) The gap between the box and the wall must be fully sealed with sealant / foaming agent + sealant. There should be no gaps or holes. The door sealing strip must be complete, undamaged, and without distortion. It should be tightly pressed without light leakage after closing. Interlock Function Must Be Adjusted Correctly Electronic / Mechanical Interlock: When one door is opened, the other door must be absolutely unable to open. After powering on, repeatedly test: Door A opens → Door B locked; Door A closed → Door B can be opened. Electrical Installation Power Supply: AC220V/50Hz, independent socket
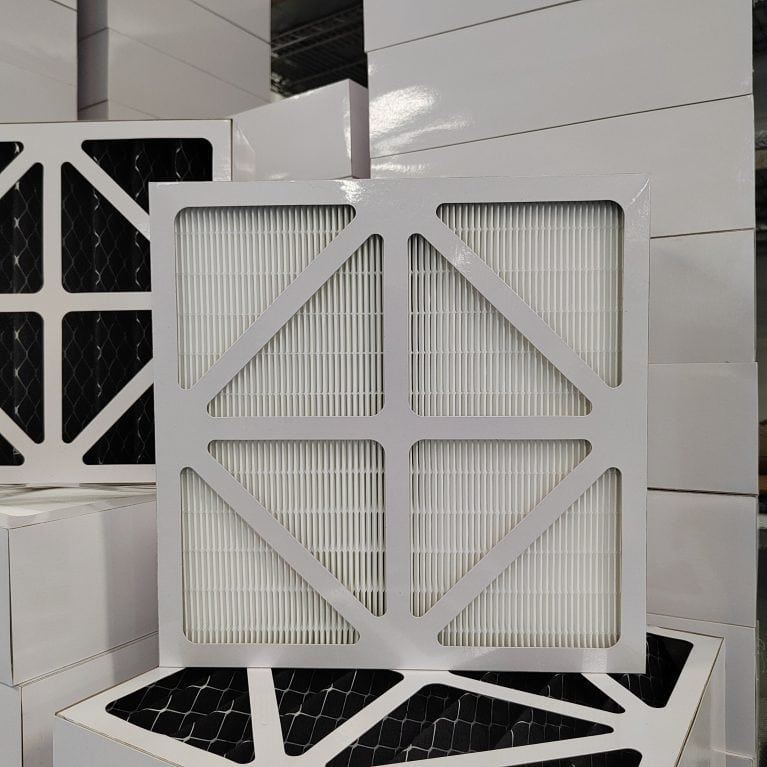
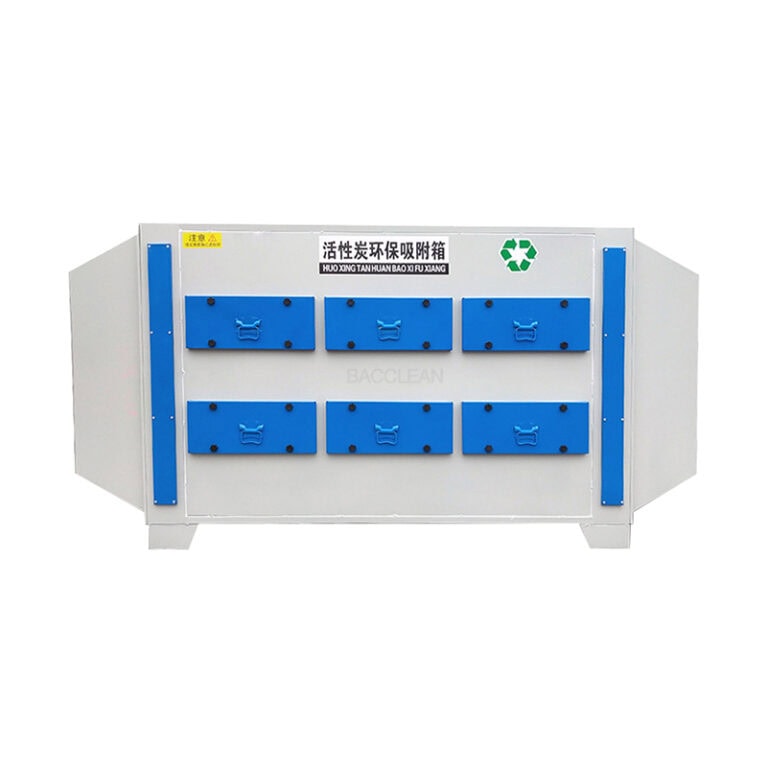
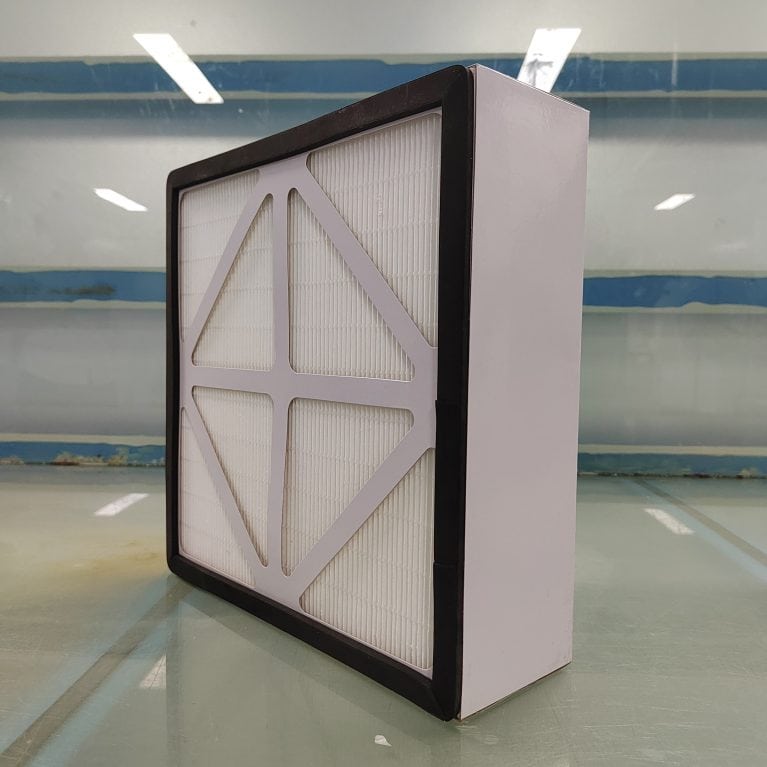
To extend the lifespan of the paper frame high-efficiency filter, the key lies in one thing: avoid allowing large particles and dust to directly block the high-efficiency section, and prevent dirt from reaching it in advance. Here are the most practical and immediately applicable methods in the field: 1. Front-end filtration setup (most crucial) It must be combined with a primary filter + a secondary filter + a tertiary filter Fresh air → Primary filter → Secondary filter → High-efficiency filter The primary and secondary filters should be replaced regularly, not waiting until they are completely clogged Primary filter: replace or clean every 1 to 3 months Secondary filter: replace every 3 to 6 months A well-set front-end filtration system can directly extend the lifespan of the high-efficiency filter by 30% to 100% 2. Control environmental humidity and temperature The paper frame is afraid of moisture and water. If the humidity remains above 80% for a long time, it is prone to deformation, warping, and air leakage. Avoid direct contact of condensation water, spray, and water leakage with the filter The environmental temperature should be as low as possible, below 60℃. High temperatures will cause the paper frame to soften
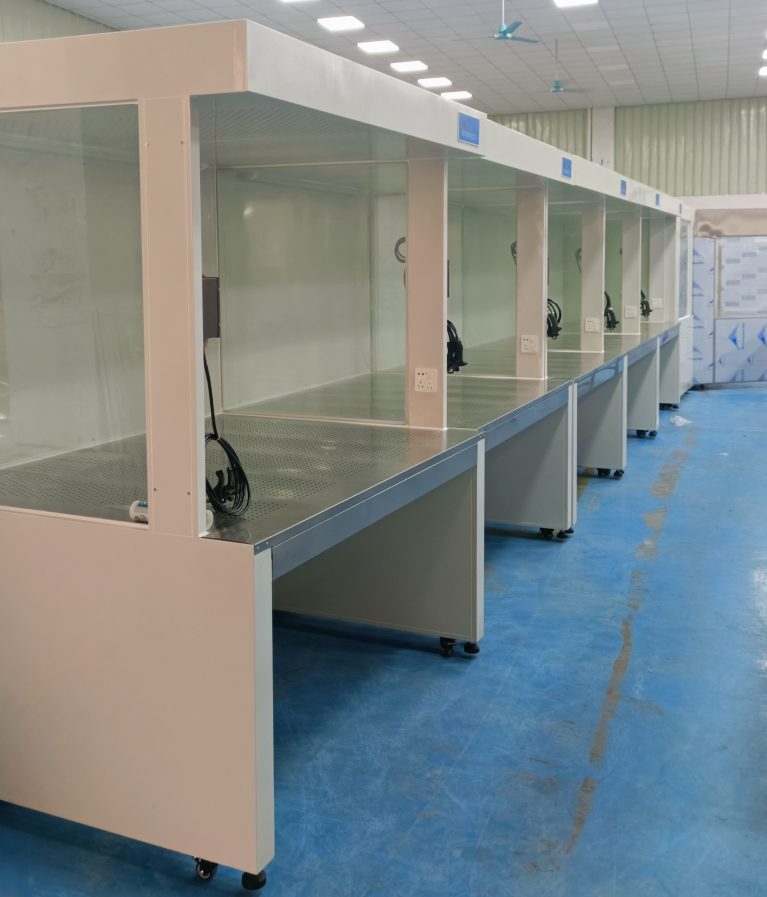
Below is a detailed list of the most crucial, easily overlooked, and directly affecting the lifespan and cleaning efficiency aspects when installing an efficient filter in a manual double-door or shower room, specifically for this purpose. It is practical and can be directly followed: 1. Pre-installation precautions Make sure the direction is absolutely correct and the filter cannot be installed backwards. The efficient filter has arrow markings, and the arrow must be in the same direction as the airflow (in a shower room, it usually blows from the outside to the inside). Installing it backwards will result in high resistance, easy clogging, sealing failure, and a halved lifespan. Clean the installation frame and box Before installation, wipe the static pressure box, installation slot, and sealing strip position with a dust-free cloth. There should be no dust or debris. Dust can cause poor sealing and air leakage. Do not touch or squeeze the filter paper with your hands. Finger oil and sweat can damage the filter paper structure, causing local blockage or leakage. Only grasp the metal frame when moving, do not pinch the filter paper. 2. Sealing section (most critical) The sealing strip must be complete, without fractures, and not
Based on the automatic double-door cargo shower room conditions you have been asking about, here is the most practical and industry-standard lifespan conclusion for you: 1. General usage environment (most factories) Electronic, food, ordinary clean workshops, little dust Used for 8 to 12 hours per day, normal maintenance Efficient filter lifespan: 1 to 2 years 2. High dust, high usage frequency environment Raw material workshop, packaging workshop, large dust, frequent transfer 24-hour operation or extremely high usage frequency Lifespan: 6 to 12 months 3. Pharmaceutical / GMP sterile clean area Strict compliance requirements, not just about whether it is blocked Suggested lifespan: No more than 12 to 18 months for mandatory assessment and replacement 4. What truly determines whether to replace or not is not the time As long as any of the following occurs, even if only used for 1 month, it should be replaced: Pressure difference exceeds the initial pressure difference by more than 1.5 times PAO leak detection or particle scanning shows leakage The air outlet of the shower room has significantly reduced wind speed Filter material is damaged, damp, or moldy 5. Remember in one sentence Maintain well, less dust: 1 to 2 years High dust,