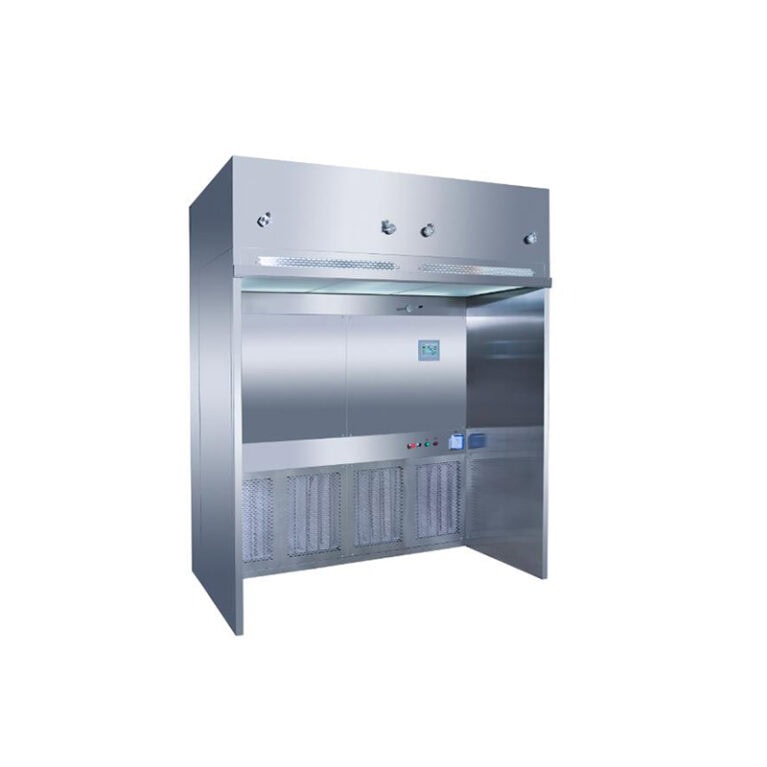
Specification for Filter Replacement of Horizontal Flow Cleanroom Workstations (Primary Efficiency + High Efficiency)
The filters of horizontal flow cleanroom workstations are divided into primary efficiency filters (preliminary protection, washable / replaceable) and high-efficiency filters (HEPA/ULPA) (core filters, not washable, as the core item for replacement). The replacement procedures, timing, and operation requirements for the two types are significantly different. The core principle of replacement is: power-off operation, clean protection, model matching, strict sealing, and verification after replacement. The entire process should avoid introducing dust pollution into the duct, ensuring that the operation area reaches 100-level (ISO 5 grade) cleanliness after replacement. The following are the direct and applicable replacement steps for each type, including replacement timing, preparation, practical operation, and verification throughout the process.
Core prerequisite: Determine the replacement timing (avoid blind replacement / overuse)
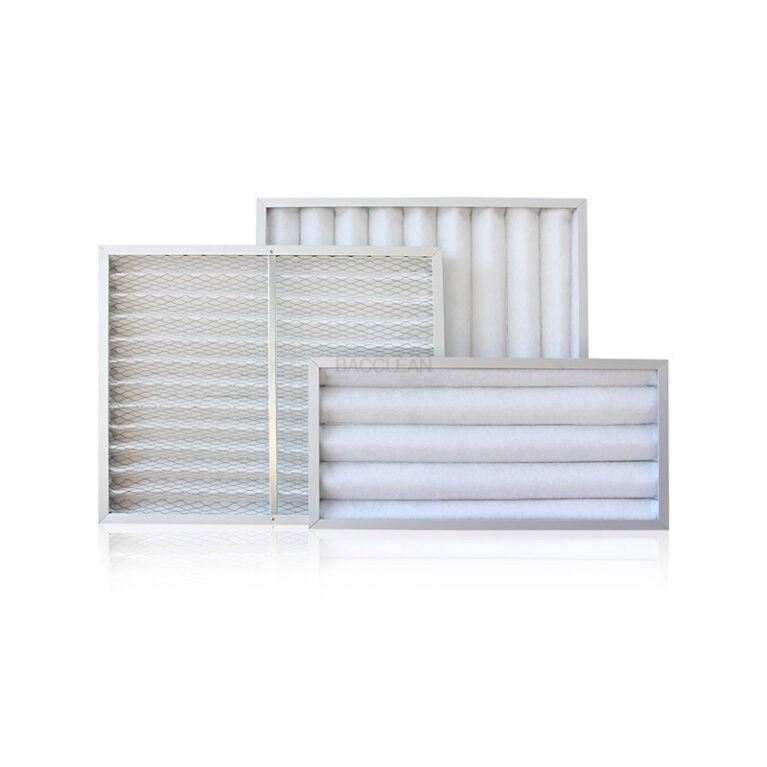
1. Replacement timing for primary efficiency filters (priority cleaning, replace if not recoverable)
The primary efficiency filter is a washable consumable. First, clean it according to maintenance requirements with water / compressed air. Replace it if any of the following situations occur:
After 2-3 cleanings, the filter screen is deformed or damaged, or the surface dust cannot be completely removed, and the airflow speed after startup significantly decreases;
The pressure difference meter shows a reading that is 10% higher than the rated value, and it still does not fall after cleaning;
The filter frame has aged and the sealing rubber strip has fallen off, resulting in air leakage gaps.
Regular replacement cycle: High-frequency use (daily startup) 1-2 years, non-high-frequency use 2-3 years (or determined by the effect after cleaning).
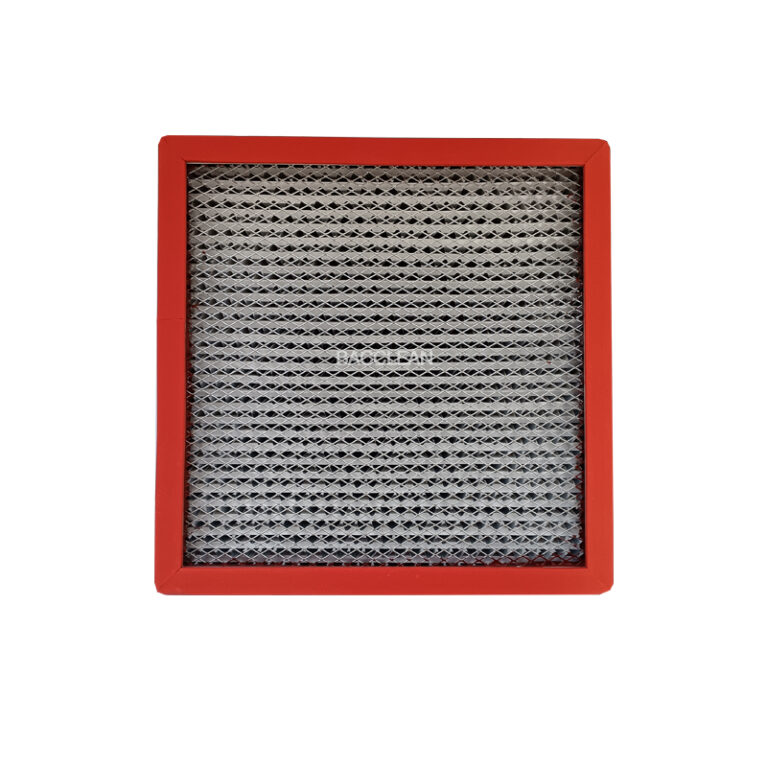
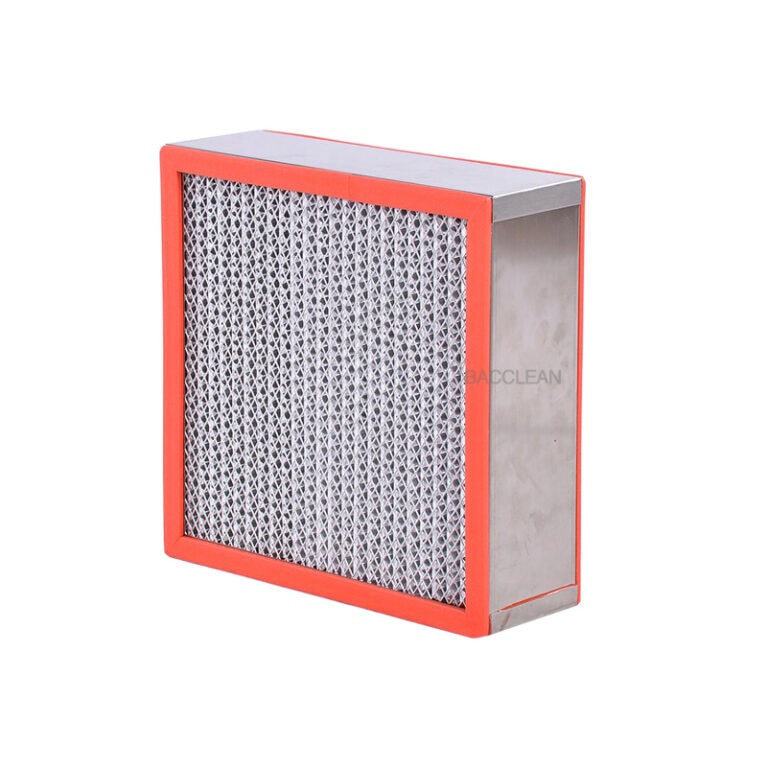
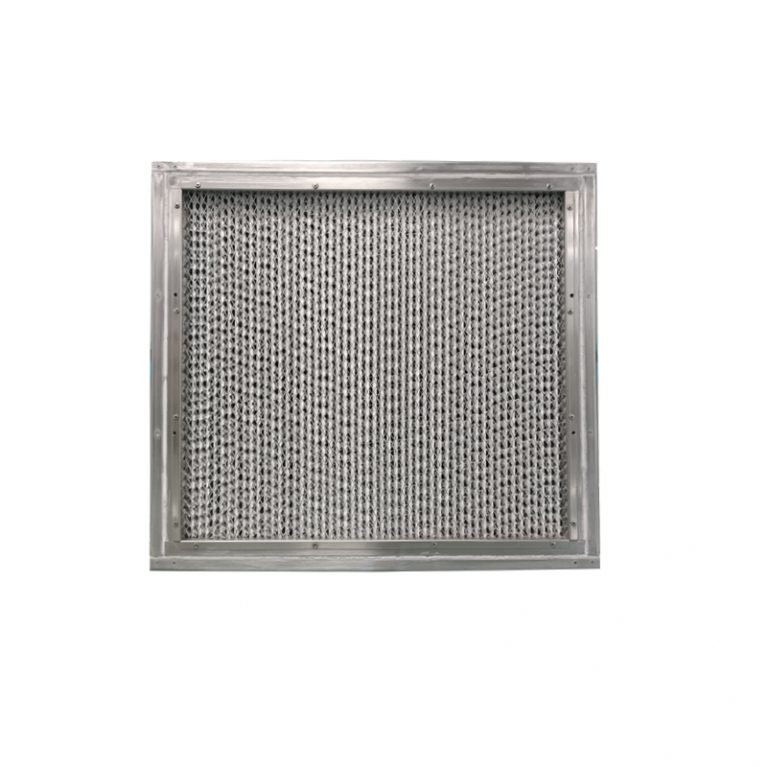
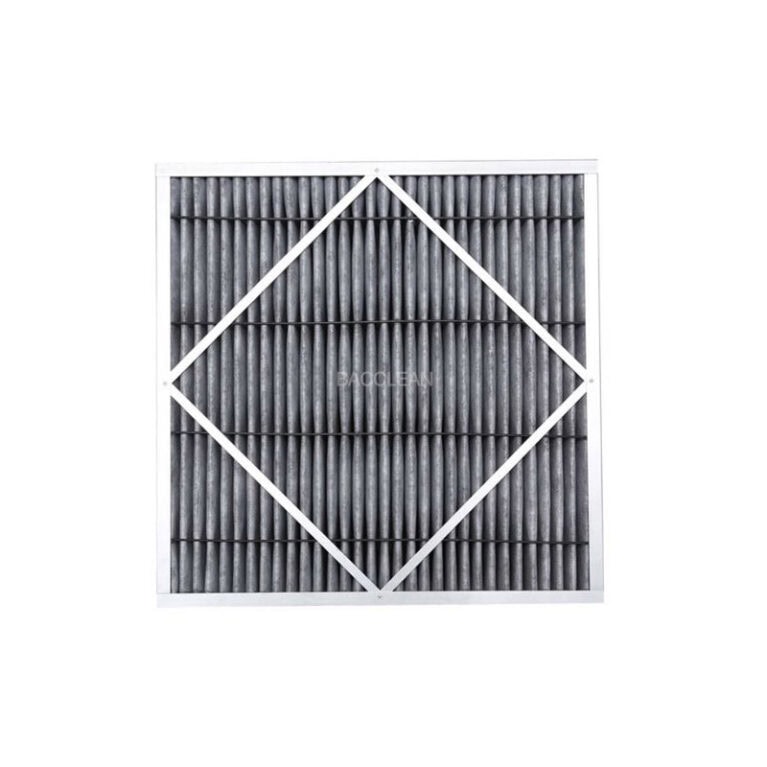
2. Replacement timing for high-efficiency filters (not washable, replace when meeting standards, core replacement item)
The high-efficiency filter is the key to ensuring cleanliness. It is a one-time consumable. Replace it immediately if any of the following situations occur, without a fixed cycle, based on pressure difference and performance as the core judgment criteria:
The pressure difference meter shows a reading that continuously exceeds the rated value by 30% (for horizontal flow workstations, the rated pressure difference is 200-300 Pa, refer to the equipment manual), this is the most direct replacement signal;
The equipment is used frequently for 6-12 months, or although it has not reached the time limit, but the cleanliness of the operation area detected by the particle counter does not meet the standard (particle count exceeds the 100-level standard);
The filter screen is damaged, the inlet air is heavily dusted, or the sealing rubber strip of the installation frame is aging or cracked;
After equipment relocation or maintenance, the high-efficiency filter is loose, shifted, and cannot be resealed.
General preparation (primary efficiency / high efficiency replacement both need to be executed to ensure the operation is clean)
Equipment and environment preparation: Turn off the main power supply of the equipment and unplug the plug, make a power-off mark; clean the 1-meter area around the workbench, no dust or debris; close the doors and windows of the operation room 30 minutes in advance, do not turn on the fan / fresh air, reduce the suspended particles in the environment.
Personnel protection: Wear a complete dust-free clean suit, dust-free cap, dust-free gloves, disposable mask, completely cover hair and skin, wipe hands with 75% medical alcohol, do not wear jewelry, do not apply hand cream (to avoid generating fibers / particles).
Tools and consumables preparation:
New filters matching the equipment model (primary efficiency / high efficiency, need to bring manufacturer’s qualified certificate, filtration efficiency test report, high-efficiency filters need to confirm the filter screen size, sealing method and installation frame match);
Dust-free wiping cloth, 75% medical alcohol, dust-free spray bottle (only for high-efficiency replacement);
Backup sealing rubber strips (if the original frame rubber strip is aging, the same specification as the filter);
Non-fibrous tape (only for emergency use, prioritize replacing the rubber strip), cross-head screwdriver (for some equipment maintenance doors fixed by screws, need a special tool, do not use tools that may flake off paint or produce metal debris).
Equipment pre-cleaning: Dip the dust-free wiping cloth in 75% alcohol, wipe the operation area of the workbench, return air / supply air outlet, outside surface of the maintenance door, avoid dust falling into the duct during disassembly. I. Initial Filter Replacement (Simple operation, can be performed by non-professionals. Core: Snap fastening + Sealing)
The initial filter of the horizontal flow clean bench is mostly located at the rear exhaust port / bottom intake port (snap fastening, no need for professional tools). The replacement process consists of 5 steps, and the entire process takes 10-15 minutes:
Remove the old filter: Open the plastic cover of the exhaust port / intake port (snap fastening directly opens, screw type uses a screwdriver to unscrew, place it on a clean dust-free cloth); pinch the handle of the old filter and slowly horizontally remove it, avoid shaking and squeezing (to prevent dust from scattering into the air duct inlet), place the old filter in a sealed dust-free bag to avoid contaminating the environment.
Clean the installation position: Dip a dust-free wiping cloth in 75% alcohol, repeatedly wipe the inner wall, snap fastening, and sealing rubber strip of the filter installation frame, focus on removing accumulated dust and stains, ensure that the installation position has no residual particles, and the rubber strip has no detachment or cracking (if the rubber strip is aged, directly replace with a new one).
Install the new filter: Take out the new initial filter, remove the surface protective film, place it in the installation frame according to the marking direction (inlet face / outlet face, the filter has an arrow indicating the direction of airflow, consistent with the airflow direction), ensure that the filter is fully adhered to the frame without gaps; gently press the filter and fasten the snap fastener (screw type then tighten the screws, moderate force to avoid frame deformation).
Restore the cover: Put the exhaust port / intake port cover back and tighten / secure it, check for seamless sealing between the cover and the equipment body.
Initial cleaning: Use a dust-free cloth to wipe the external disassembly area of the equipment, clean up a small amount of particles generated during operation.
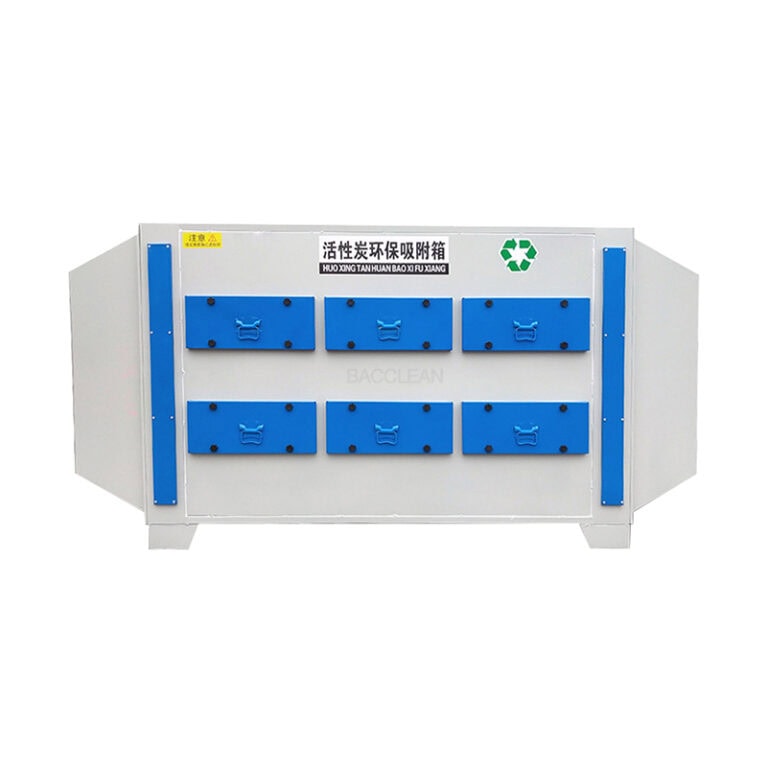
II. High-efficiency Filter Replacement (Core operation, focus: Prevent dust scattering + Sealing tightly, non-professionals can assist, recommended professional personnel to lead)
The high-efficiency filter of the horizontal flow clean bench is mostly located inside the rear supply air port of the equipment (as the source of supply air for the horizontal airflow). Some equipment requires disassembling the rear side maintenance door for replacement. The replacement process is the core key, the entire process requires gentle operation, must prevent dust from entering the internal air duct, the steps are as follows (the entire process takes 20-30 minutes):
Remove the maintenance door / supply air port cover: Find the high-efficiency filter maintenance door on the rear side of the equipment (mostly screws fixed, a few are snap fastening type), use a screwdriver to unscrew the screws (screws placed in a dust-free storage box to avoid loss / contamination by dust), gently remove the maintenance door, place it on a dust-free cloth, do not place it directly on the ground.
Remove the old high-efficiency filter (core anti-contamination step):
The old filter is frame-type fixed, first loosen the fixing snap fastener / pressure strip on both sides of the filter (do not use sharp tools to pry, to avoid damaging the inner wall of the air duct);
Hold the filter frame with both hands, slowly and horizontally pull out, throughout do not shake, flip, or squeeze the filter (the high-efficiency filter retains a large amount of particles, shaking will cause particles to scatter into the air duct, making the subsequent cleaning difficult);
Immediately after removing, place the old filter in a double-layer sealed dust-free bag, tie the bag tightly, move to the operation area outside, avoid disassembling in the equipment vicinity.
Deep cleaning the installation frame and air duct inlet (the most critical sealing pre-step):
Use a dust-free wiping cloth dipped in 75% alcohol, from the inside to the outside, repeatedly wipe the high-efficiency filter installation frame (including the inner wall, sealing rubber strip, snap fastener / pressure strip), focus on removing dust and stains on the frame, ensure that the surface of the rubber strip has no foreign matter (the rubber strip is the core of sealing, if aged, cracked, or detached, must first replace the new rubber strip, then install the new filter);
If there is a small amount of dust at the air duct inlet, use a dust-free cloth to gently wipe (do not use compressed air to blow, to avoid dust blowing into the deep part of the air duct), ensure that the installation position has no residual particles remaining.
Install the new high-efficiency filter (core sealing step, determines the cleanliness after replacement):
Remove the new high-efficiency filter, tear off the sealing protective films on both sides (note: only remove the protection film on the installation surface, do not remove the protection film on the air outlet before starting the machine. The airflow will naturally fall after startup). Check if the sealing rubber strips on the filter frame are intact and undamaged;
Hold the filter frame with both hands, follow the marking direction (the air supply arrow is consistent with the horizontal airflow direction, and the filter has clear markings), slowly place it into the installation frame, ensuring that the sealing rubber strips around the filter frame are fully adhered to the installation frame without any gaps (gaps will cause air leakage and directly result in non-compliance of the operating area’s cleanliness);
Tighten the fixed clips / strips on both sides of the filter, apply uniform force to avoid deformation of the filter frame (deformation will create new gaps), ensure that the filter is not loose or displaced within the frame (push the filter gently with your hand, it should not shake);
Restore the maintenance door: gently install the maintenance door back to the rear of the equipment, tighten the screws (tighten the screws in a diagonal order, with moderate force to prevent the maintenance door from deforming and ensuring a seamless seal with the machine body), wipe the outside and surrounding areas of the maintenance door with a dust-free cloth.
III. General operation after replacement: Startup verification + Cleaning + Recording (core of compliance, ensuring the equipment operates in compliance)
After the initial efficiency / high-efficiency filter replacement is completed, it is necessary to perform startup verification to confirm that the airflow and cleanliness are up to standard, and make records, in line with equipment maintenance compliance management requirements. The steps are as follows:
Startup pre-run cleaning: Connect the power supply of the equipment, turn on the fan switch, adjust the glass baffle to the rated operating height (10-15cm), pre-run the empty machine for 30-40 minutes, completely remove the small particles introduced during the replacement process, and do not touch the operating area during this period.
Core performance verification:
Initial efficiency filter: Use a wind speed meter to detect the air speed at the outlet of the operating area, confirm that it returns to the rated value (for a horizontal flow workbench, the rated air speed is 0.3-0.5m/s, refer to the manual), the pressure difference reading should fall within the normal range;
High-efficiency filter: ① Wind speed detection: The wind speed deviation at different points of the operating area (left, middle, right) is ≤±0.05m/s, the airflow is uniform; ② Cleanliness detection: Use a dust particle counter to detect the cleanliness of the operating area at the hundred-level standard, confirm that the number of 0.5μm particles ≤3500 particles/m³, 5μm particles ≤0 particles/m³; ③ Pressure difference detection: The pressure difference reading should fall within the rated range, and there should be no significant fluctuations after running for 30 minutes.
If it is an enterprise / compliance laboratory, after the replacement of the high-efficiency filter, the cleanliness detection report must be retained, attached to the maintenance record.
Final cleaning of the operation area: After verification and compliance, turn off the fan, use a lint-free cloth dipped in 75% alcohol to wipe the operation surface, inner walls and air outlets, and clean up the small amount of particles accumulated during the pre-operation process. Then, restart the machine and it can be used normally.
Standardized document: fill in the equipment maintenance records, core information includes: Change date, operators, filter model/manufacturer/certificate number, change reasons (such as differential pressure exceeds bid/maturity), replaced after test data (wind speed/pressure differential/cleanliness), qualified certificate, test report photocopy attached to the filter, File according to the requirements of industry (such as electronic/kept in the pharmaceutical industry for 3 years or above).
Iv. Replacement of Core Taboos and Precautions (Red Line Clause, Strictly Prohibited from Violation)
It is strictly prohibited to dismantle the filter without disconnecting the power supply, or to replace it when the operation room is dusty or there is a large flow of personnel, to avoid electric shock and dust pollution;
When replacing the high-efficiency filter, it is strictly prohibited to shake, flip the old filter, or disassemble around the equipment to prevent the retained particles from scattering into the air duct and being unable to be thoroughly cleaned later;
It is strictly prohibited to install non-matching models of filters (filter net size, frame size do not match), forcing installation will create sealing gaps, directly resulting in non-compliance of cleanliness; It is strictly prohibited to use ordinary rags or tissues to clean the installation frame. Only dust-free wiping cloths and 75% alcohol can be used to avoid fiber residue.
The sealing strips of the high-efficiency filters must not be replaced with non-fiber tapes (as the tapes are prone to aging and falling off, causing fiber contamination). If the sealing strips are aged, they must be replaced with new ones of the same specification directly.
Non-professionals can only replace the primary-efficiency filters. The replacement of high-efficiency filters is recommended to be led by the equipment manufacturer or professional maintenance personnel. Enterprises with laboratories can have trained personnel perform the replacement to ensure compliance with sealing and verification.
Waste filters should be classified and handled as industrial solid waste. High-efficiency filters should be discarded after sealing, and it is prohibited to disassemble or discard them randomly in the clean area.
Supplement: Emergency handling for leakage of high-efficiency filters
If the cleanliness of the operating area is not up to standard after replacement, it is likely that the filter installation is leaking. Immediately stop the machine for handling:
Open the maintenance door, check whether the sealing strips around the filter are in close contact and there are no gaps. If there are, adjust the position of the filter to ensure that the sealing strips are fully compressed;
If the sealing strips are aged, replace them with new ones and reinstall them;
If the frame is deformed and cannot seal, contact the equipment manufacturer to replace the installation frame. It is prohibited to temporarily seal with tapes.