Standard Procedure and Operating Specifications for HEPA/ULPA Filter Replacement
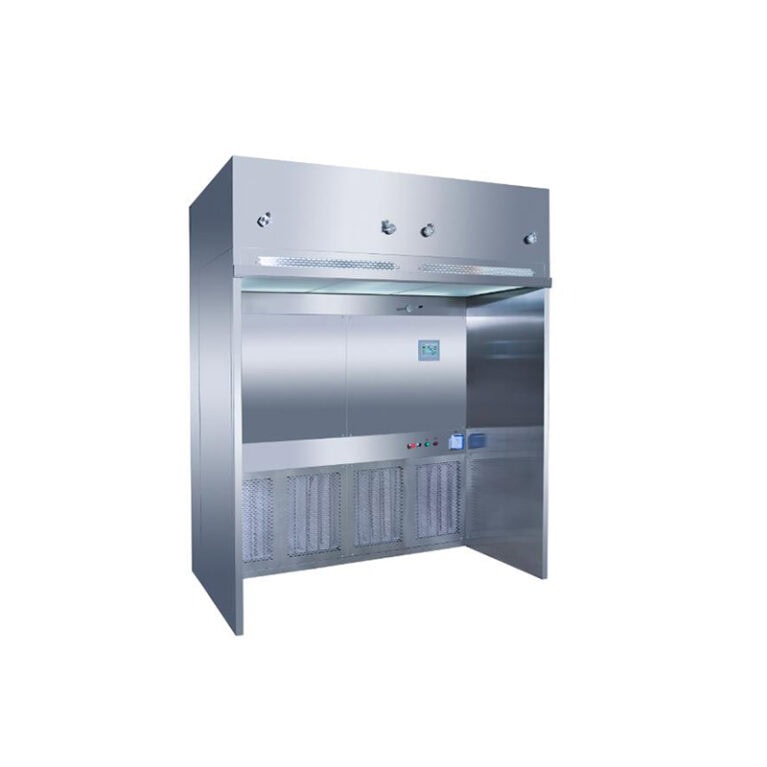
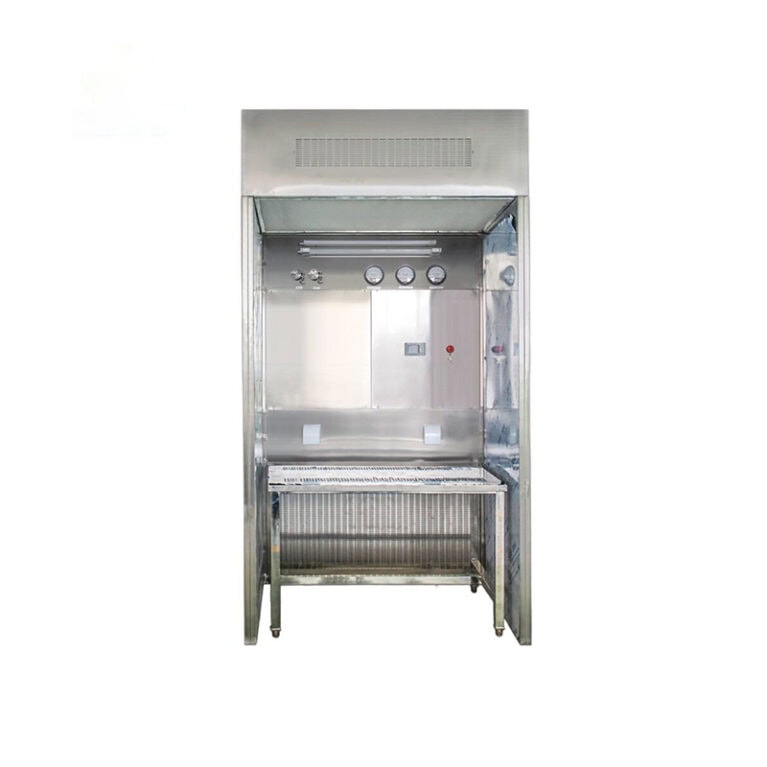
HEPA/ULPA filters, as the core purification components of laminar flow hoods, their replacement quality directly affects the cleaning effect and the stability of equipment operation. They must strictly follow the full-process norms of “preparation – disassembly – installation – verification”, especially suitable for industries with strict cleanliness requirements, such as pharmaceuticals and electronics. The specific operation steps and precautions are as follows:
I. Preparativos antes de la sustitución
(1) Confirmation of preconditions
Replacement timing judgment: When the pressure difference of the filter screen reaches twice the initial pressure difference (generally, the initial pressure difference of HEPA filters is about 200-300Pa, and that of ULPA is about 300-400Pa), or when the cleanliness test does not meet the standards (such as excessive particle count in A-level areas), or when the filter screen is damaged or has an odor, it needs to be replaced immediately. The recommended regular replacement cycle is 1 to 2 years (specifically, depending on the usage environment and the equipment manual).
Compliance and safety preparations: Replacement operations should be carried out during production breaks and reported to the production and quality departments in advance. Before entering the clean area, operators must wear complete clean suits (hats, masks, gloves, and shoe covers), abide by the management regulations of the clean area, and avoid human contamination.
Tool and material preparation
Tools: Lint-free cloth, neutral detergent, torque wrench (or screwdriver), sealant (clean resistant, particle-free type), particle counter (for inspection after replacement);
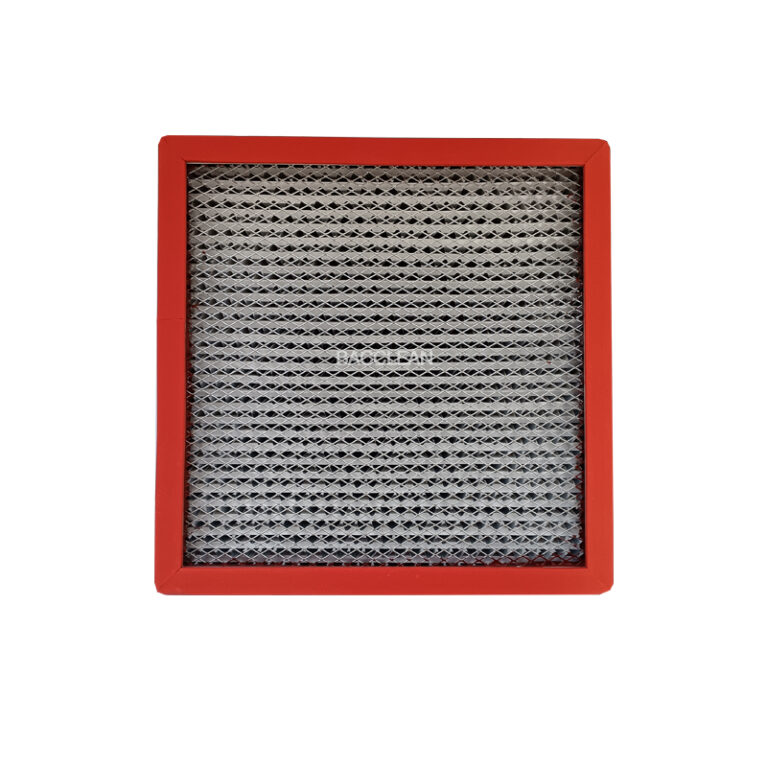
Materials: HEPA/ULPA filters of the same model that comply with regulations (factory inspection reports and certificates of conformity are required, with filtration efficiency meeting design requirements, such as HEPA≥99.999%@0.3μm, ULPA≥99.9995%@0.12μm), and new sealing strips (if the original strips are aged).
(II) Equipment and Environmental Pretreatment
Turn off the power supply of the laminar flow hood and post the “Under Maintenance” sign to prevent misoperation.
Use a lint-free cloth dipped in neutral detergent to wipe the internal frame and filter screen installation groove of the laminar flow hood to remove accumulated dust and stains. Wait for it to dry before proceeding with subsequent operations.
Clean and protect the surrounding area of the operation zone to prevent dust from spreading to the production area during the replacement process.
Ii. Disassembly process of the old Filter Screen
Open the inspection panel: According to the structure of the laminar flow hood (top-mounted/side-mounted), use tools to remove the filter screen inspection door or panel. During the disassembly process, handle it gently to avoid vibration that may cause dust to fall off.
Record the information of the old filter screen: Take photos to keep the model, installation date, and pressure difference data of the old filter screen, and record them in the equipment maintenance ledger as the basis for compliance traceability.
Disassemble the old filter screen.
Loosen the filter screen fixing bolts (or clips), and pay attention to the storage of the bolts (to avoid loss or contamination).
Hold the edge of the filter screen with both hands and take it out slowly and vertically to avoid the filter screen tilting and causing the dust inside to fall off.
If the filter screen is stuck to the frame, you can gently pry the edge (do not pull hard) to prevent the frame from deforming.
Disposal of old filter screens: Put the old filter screens into sealed bags (or dedicated recycling containers), and dispose of them in accordance with hazardous waste management regulations (especially for filter screens used in the production of highly active and toxic drugs, they need to be sealed and collected by designated personnel to avoid environmental pollution or harm to human health).
Iii. Installation Specifications for New Filter Screens
New filter screen inspection: After opening the box, check that the appearance of the new filter screen is undamaged or deformed, the sealing rubber strip is intact (no detachment or aging), the filter screen and filter paper are free of wrinkles and stains, and verify that the model and the test report are correct.
Pre-treatment before installation: Gently wipe the surface of the new filter screen with a lint-free cloth (only wipe the edge frame, do not touch the filter paper) to ensure no dust adheres.
Precise installation and positioning
Place the filter screen steadily into the installation slot in the direction indicated by the arrow on the filter screen (the airflow direction, usually “from outside to inside” or “from top to bottom”, which should be consistent with the airflow direction of the laminar flow hood).
Ensure that the filter screen is closely attached to the installation groove without any offset or gap, and that the sealing rubber strip fully covers the contact surface (if the rubber strip is a split type, it needs to be pasted on the edge of the filter screen in advance to ensure there are no breaks in the rubber strip).
Fixation and sealing reinforcement
Use a torque wrench to evenly tighten the fixing bolts (the torque should be in accordance with the requirements of the equipment manual, generally 8-12N · m) to avoid uneven local force, which may cause deformation of the filter screen or poor sealing.
If the gap between the installation groove and the filter screen is relatively large, a small amount of sealant can be applied to the contact surface (it is strictly forbidden for the sealant to overflow and contaminate the filter paper) to further enhance the sealing effect.
Restore the inspection panel: Reset the inspection door or panel, tighten the fixing screws, and ensure that the panel is well sealed without any air leakage gaps.
Iv. Verification and Closure after Replacement
Equipment trial operation: Connect the power supply of the laminar flow hood, start the equipment, and run it for 30 minutes. Observe the operating status of the fan (no abnormal noise or vibration), and check whether the wind speed is within the design range (0.36-0.54m/s).
Cleanliness and pressure difference detection
Use A particle counter to test the cleanliness of the operation area (for example, in the A-level area, the number of particles ≥0.5μm ≤3520 per m³, and no microorganisms should be detected) to ensure compliance with requirements.
Detect the pressure difference before and after the filter screen, record the initial pressure difference data, and confirm that the pressure difference is within the normal range specified by the equipment.
Cleaning and environmental restoration: Wipe the exterior of the laminar flow hood and the operation area with a lint-free cloth, clean tools and waste, and ensure there is no dust residue.
Ledgers and compliance records
Record in detail the replacement date, new filter screen model/batch, test data, operator, and other information, and file them in the equipment maintenance file (which should be kept for at least 3 years after the equipment is scrapped).
If it is in the pharmaceutical industry, the replacement records need to be included in the GMP compliance documents for regulatory verification.
V. Key Points to Note
Do not touch the filter paper: Throughout the process, do not touch the filter screen or filter paper with your hands or tools to avoid damage or contamination, which may affect the filtration efficiency.
The airflow direction must be correct: The installation direction of the filter screen must be consistent with the airflow direction of the laminar flow hood; otherwise, it will lead to substandard cleanliness and abnormal pressure difference.
Sealing is the core: After installation, it is necessary to ensure that there is no gap between the filter screen and the frame. Air leakage will directly lead to the failure of the cleaning effect. If necessary, the sealing performance can be checked through a smoke test.
Professional operation requirements: Untrained personnel are not allowed to perform replacement operations, especially ULPA filters (with higher precision and stricter installation requirements).
Storage conditions for filter screens: New filter screens should be stored in a dry, clean, and odor-free environment, avoiding squeezing and moisture. The storage temperature should be between 10 and 30℃, and the relative humidity should be no more than 70%.
Following the above process can ensure the standardization and effectiveness of HEPA/ULPA filter replacement, which not only guarantees the clean performance of laminar flow hoods but also meets industry compliance requirements and extends the service life of the equipment.
HEPA/ULPA filters, as the core purification components of laminar flow hoods, their replacement quality directly affects the cleaning effect and the stability of equipment operation. They must strictly follow the full-process norms of “preparation – disassembly – installation – verification”, especially suitable for industries with strict cleanliness requirements, such as pharmaceuticals and electronics. The specific operation steps and precautions are as follows:
I. Preparativos antes de la sustitución
(1) Confirmation of preconditions
Replacement timing judgment: When the pressure difference of the filter screen reaches twice the initial pressure difference (generally, the initial pressure difference of HEPA filters is about 200-300Pa, and that of ULPA is about 300-400Pa), or when the cleanliness test does not meet the standards (such as excessive particle count in A-level areas), or when the filter screen is damaged or has an odor, it needs to be replaced immediately. The recommended regular replacement cycle is 1 to 2 years (specifically, depending on the usage environment and the equipment manual).
Compliance and safety preparations: Replacement operations should be carried out during production breaks and reported to the production and quality departments in advance. Before entering the clean area, operators must wear complete clean suits (hats, masks, gloves, and shoe covers), abide by the management regulations of the clean area, and avoid human contamination.
Tool and material preparation
Tools: Lint-free cloth, neutral detergent, torque wrench (or screwdriver), sealant (clean resistant, particle-free type), particle counter (for inspection after replacement);
Materials: HEPA/ULPA filters of the same model that comply with regulations (factory inspection reports and certificates of conformity are required, with filtration efficiency meeting design requirements, such as HEPA≥99.999%@0.3μm, ULPA≥99.9995%@0.12μm), and new sealing strips (if the original strips are aged).
(II) Equipment and Environmental Pretreatment
Turn off the power supply of the laminar flow hood and post the “Under Maintenance” sign to prevent misoperation.
Use a lint-free cloth dipped in neutral detergent to wipe the internal frame and filter screen installation groove of the laminar flow hood to remove accumulated dust and stains. Wait for it to dry before proceeding with subsequent operations.
Clean and protect the surrounding area of the operation zone to prevent dust from spreading to the production area during the replacement process.
Ii. Disassembly process of the old Filter Screen
Open the inspection panel: According to the structure of the laminar flow hood (top-mounted/side-mounted), use tools to remove the filter screen inspection door or panel. During the disassembly process, handle it gently to avoid vibration that may cause dust to fall off.
Record the information of the old filter screen: Take photos to keep the model, installation date, and pressure difference data of the old filter screen, and record them in the equipment maintenance ledger as the basis for compliance traceability.
Disassemble the old filter screen.
Loosen the filter screen fixing bolts (or clips), and pay attention to the storage of the bolts (to avoid loss or contamination).
Hold the edge of the filter screen with both hands and take it out slowly and vertically to avoid the filter screen tilting and causing the dust inside to fall off.
If the filter screen is stuck to the frame, you can gently pry the edge (do not pull hard) to prevent the frame from deforming.
Disposal of old filter screens: Put the old filter screens into sealed bags (or dedicated recycling containers), and dispose of them in accordance with hazardous waste management regulations (especially for filter screens used in the production of highly active and toxic drugs, they need to be sealed and collected by designated personnel to avoid environmental pollution or harm to human health).
Iii. Installation Specifications for New Filter Screens
New filter screen inspection: After opening the box, check that the appearance of the new filter screen is undamaged or deformed, the sealing rubber strip is intact (no detachment or aging), the filter screen and filter paper are free of wrinkles and stains, and verify that the model and the test report are correct.
Pre-treatment before installation: Gently wipe the surface of the new filter screen with a lint-free cloth (only wipe the edge frame, do not touch the filter paper) to ensure no dust adheres.
Precise installation and positioning
Place the filter screen steadily into the installation slot in the direction indicated by the arrow on the filter screen (the airflow direction, usually “from outside to inside” or “from top to bottom”, which should be consistent with the airflow direction of the laminar flow hood).
Ensure that the filter screen is closely attached to the installation groove without any offset or gap, and that the sealing rubber strip fully covers the contact surface (if the rubber strip is a split type, it needs to be pasted on the edge of the filter screen in advance to ensure there are no breaks in the rubber strip).
Fixation and sealing reinforcement
Use a torque wrench to evenly tighten the fixing bolts (the torque should be in accordance with the requirements of the equipment manual, generally 8-12N · m) to avoid uneven local force, which may cause deformation of the filter screen or poor sealing.
If the gap between the installation groove and the filter screen is relatively large, a small amount of sealant can be applied to the contact surface (it is strictly forbidden for the sealant to overflow and contaminate the filter paper) to further enhance the sealing effect.
Restore the inspection panel: Reset the inspection door or panel, tighten the fixing screws, and ensure that the panel is well sealed without any air leakage gaps.
Iv. Verification and Closure after Replacement
Equipment trial operation: Connect the power supply of the laminar flow hood, start the equipment, and run it for 30 minutes. Observe the operating status of the fan (no abnormal noise or vibration), and check whether the wind speed is within the design range (0.36-0.54m/s).
Cleanliness and pressure difference detection
Use A particle counter to test the cleanliness of the operation area (for example, in the A-level area, the number of particles ≥0.5μm ≤3520 per m³, and no microorganisms should be detected) to ensure compliance with requirements.
Detect the pressure difference before and after the filter screen, record the initial pressure difference data, and confirm that the pressure difference is within the normal range specified by the equipment.
Cleaning and environmental restoration: Wipe the exterior of the laminar flow hood and the operation area with a lint-free cloth, clean tools and waste, and ensure there is no dust residue.
Ledgers and compliance records
Record in detail the replacement date, new filter screen model/batch, test data, operator, and other information, and file them in the equipment maintenance file (which should be kept for at least 3 years after the equipment is scrapped).
If it is in the pharmaceutical industry, the replacement records need to be included in the GMP compliance documents for regulatory verification.
V. Key Points to Note
Do not touch the filter paper: Throughout the process, do not touch the filter screen or filter paper with your hands or tools to avoid damage or contamination, which may affect the filtration efficiency.
The airflow direction must be correct: The installation direction of the filter screen must be consistent with the airflow direction of the laminar flow hood; otherwise, it will lead to substandard cleanliness and abnormal pressure difference.
Sealing is the core: After installation, it is necessary to ensure that there is no gap between the filter screen and the frame. Air leakage will directly lead to the failure of the cleaning effect. If necessary, the sealing performance can be checked through a smoke test.
Professional operation requirements: Untrained personnel are not allowed to perform replacement operations, especially ULPA filters (with higher precision and stricter installation requirements).
Storage conditions for filter screens: New filter screens should be stored in a dry, clean, and odor-free environment, avoiding squeezing and moisture. The storage temperature should be between 10 and 30℃, and the relative humidity should be no more than 70%.
Following the above process can ensure the standardization and effectiveness of HEPA/ULPA filter replacement, which not only guarantees the clean performance of laminar flow hoods but also meets industry compliance requirements and extends the service life of the equipment.