I. Preparations before Installation: Avoid risks in the early stage
The inspection and preparation before installation directly affect the subsequent filtration effect. Special attention should be paid to the three core aspects: “filter status, installation environment, and tool matching”.
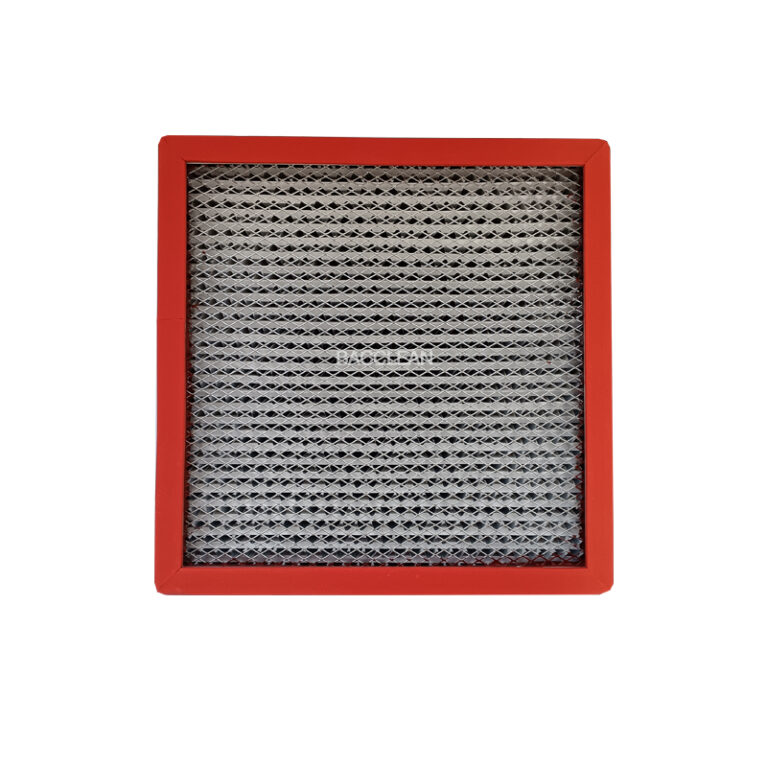
Inspection of the appearance and performance of the filter
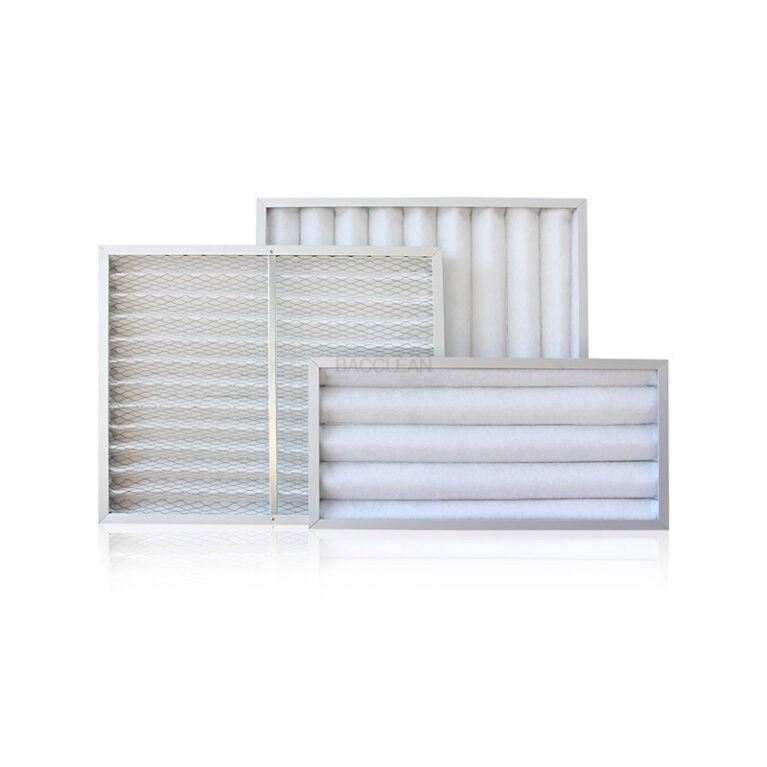
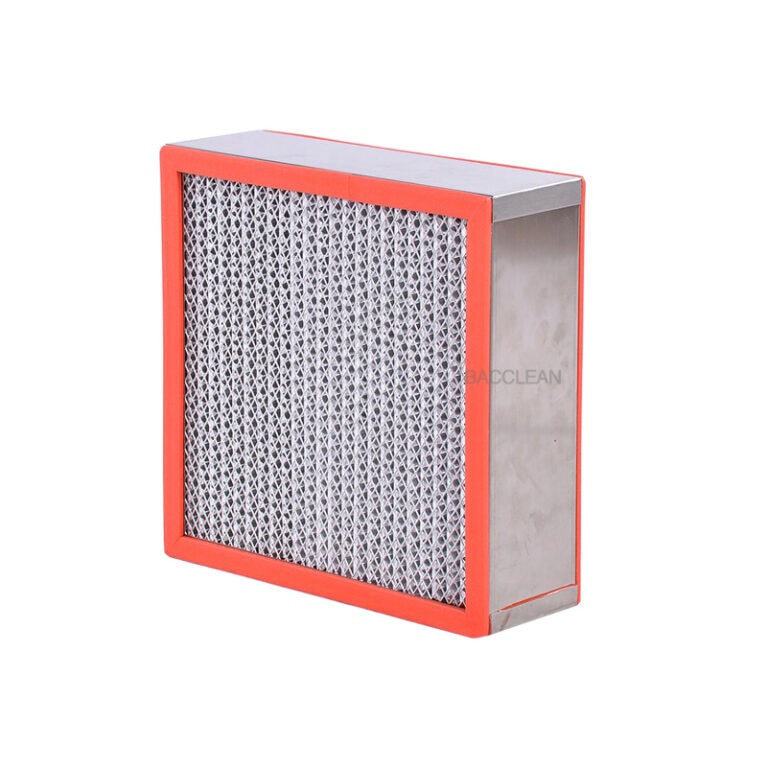
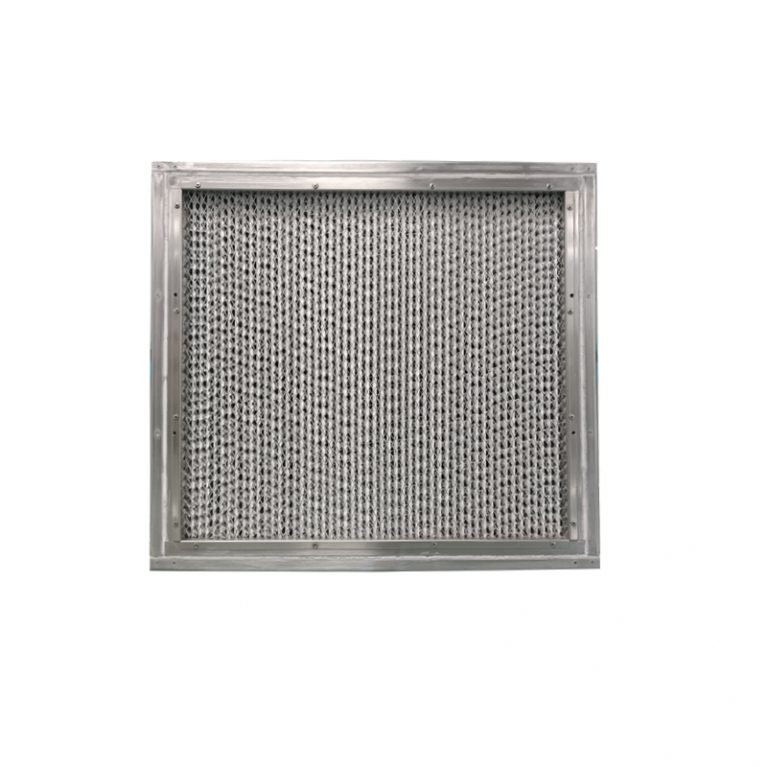
Appearance acceptance: Check whether the filter frame (galvanized steel plate, aluminum alloy, etc.) has any deformation, rust or scratches. Check whether the filter material (mainly glass fiber) is damaged, wrinkled or leaking glue. Check whether the sealing rubber strips (such as nitrile rubber, silicone rubber, etc.) are intact, have not fallen off, and are closely attached to the frame.
Performance verification: Check whether the model of the filter, filtration efficiency (such as H13), rated air volume, and temperature resistance grade are consistent with the design requirements (it needs to match the working conditions of the spray booth/curing room in the painting workshop), and confirm whether the attached test report (such as EN 1822 efficiency test report) is complete.
Cleaning treatment: Before installation, gently wipe the surface of the filter with a clean non-woven cloth or compressed air (below 0.3MPa, away from the filter material to blow off surface dust). It is strictly forbidden to rinse with water or cleaning agents (to avoid the filter material getting damp and becoming ineffective).
2. Installation environment and tool preparation
Environmental cleaning: Remove debris, dust and oil stains from the installation location (such as the supply air static pressure box, filter frame). If necessary, wipe the inner wall of the static pressure box with a vacuum cleaner or lint-free cloth to prevent impurities from being carried into the clean area by the airflow after installation.
Tool adaptation: Prepare specialized tools such as a torque wrench (to control the tightening force of bolts and prevent frame deformation), sealant (silicone sealant/polyurethane sealant for filling gaps), a level (to ensure the filter is installed flat), and a PAO leak detector (to test the sealing performance after installation).
Personnel protection: Installers must wear clean suits, dust-free gloves and shoe covers to prevent human hair and dander from contaminating the filter or the installation area.
Second, standardize the installation process: Ensure sealing and efficiency
The installation core of the high-efficiency filter with separators is “flat and tight fit, sealed without leakage, and correct airflow”. The following steps must be strictly followed, with particular attention paid to the sealing details between the static pressure box and the filter.
1. Installation position positioning
Confirm that the size of the installation frame (the filter slot inside the static pressure box) matches the filter, and that the frame is level and undeformed. If the frame is rusted or worn, it is necessary to first grind off the rust and apply anti-rust paint, then lay a layer of sealing rubber strip (5-8mm thick, compression rate 30%-50%).
For static pressure boxes without pre-set slots, a temporary positioning frame should be welded with Angle steel to ensure that the filter will not shift due to air flow impact after installation.
2. Filter installation (Taking “strip installation” as an example, the most commonly used in painting workshops)
Pre-positioning: Slowly place the filter into the installation frame to ensure that the air flow direction marking of the filter (” air intake → air outlet “) is consistent with the system air flow – for filters with separators, usually “the opening direction of the filter material pleat is the air outlet surface”. Do not install it in reverse (otherwise, the air resistance will increase sharply and the efficiency will drop sharply).
Initial fixation: Gently push the filter by hand to ensure that the sealing strips around it are completely in contact with the installation frame, making sure there are no obvious gaps. If the “double sealing rubber strip” design is adopted, it is necessary to confirm that the inner ring rubber strip has been completely compressed.
Press strip tightening: Cover the galvanized steel plate press strip (width ≥30mm) on the frame around the filter, and tighten it evenly with bolts (torque control at 2-3N · m to avoid excessive force causing frame deformation). It is recommended that the bolt spacing be no more than 150mm to ensure that the pressure strip is closely attached to the filter without any local lifting.
Gap filling: If there is a tiny gap between the installation frame and the filter, apply non-silicone sealant (to prevent the volatile substances of silicone sealant from contaminating the coating) evenly along the gap to form a sealing layer. Wait for the sealant layer to cure (usually 24 hours) before starting the system.
3. Post-installation sealing performance test (Key step, cannot be omitted
The painting workshop needs to verify the sealing effect through the PAO (polyalpha-olefin) leak detection method to prevent unfiltered air from seeping into the clean area.
Step 2: Use a particle counter to slowly scan downstream of the filter (2-3cm from the air outlet surface) along the frame, pressure strip, and the surface of the filter material (at a speed of ≤5cm/s).
Judgment criterion: If the reading of the particle counter is ≤0.01 particles/L (corresponding to ISO grade 5 standard), the seal is qualified. If the local reading exceeds the standard, the pressure strip needs to be readjust or the sealant reapplied until it is qualified.
Iii. Key Points of Daily Maintenance: Extend Lifespan + Stabilize Efficiency
The core of maintaining high-efficiency filters with separators is “monitoring resistance, cleaning the environment, and preventing damage”. Regular maintenance ledgers should be established to avoid filter failure due to improper maintenance.
Resistance monitoring (the most core maintenance indicator)
Install differential pressure gauges: Install differential pressure gauges (with an accuracy of ≥0.1Pa) on the “air inlet side” and “air outlet side” of the filter respectively to monitor the operating resistance in real time. Record the initial resistance (the resistance after the new filter is installed, usually 150-250Pa).
Judgment criterion: When the operating resistance reaches twice the initial resistance (or exceeds 450Pa), the filter must be replaced immediately – excessive resistance will lead to a decrease in air supply volume, loss of control of positive pressure in the clean area, and a sharp increase in energy consumption.
Abnormal handling: If the resistance suddenly drops (for example, from 300Pa to 100Pa), it may be due to filter material damage or seal failure. The machine should be stopped immediately for inspection to prevent a large amount of dust from entering the coating area.
2. Maintenance of the surrounding environment
Front-end pretreatment protection: Ensure that a medium-efficiency filter (F8 grade or above) is installed upstream of the high-efficiency filter, and replace the medium-efficiency filter regularly (it is recommended to replace it every 1-2 months) to prevent a large amount of dust from directly blocking the high-efficiency filter and shortening its service life.
Static pressure box cleaning: Open the static pressure box for inspection every quarter and use a vacuum cleaner to clean the accumulated dust inside. If oil stains are found on the inner wall of the static pressure box (such as oil and gas backflow in the painting workshop), they should be wiped clean with a neutral cleaner to prevent the oil stains from adhering to the air intake surface of the filter and affecting the air permeability.
Avoid dampness and corrosion: For damp areas such as below the spray booth, it is necessary to regularly check whether the filter frame is rusted and whether the sealing rubber strips are aged. If rust occurs, it needs to be ground and then coated with anti-rust paint. When the rubber strips age, they need to be replaced in time to prevent air leakage.
3. Operation status check
Airflow stability: Observe the airflow organization in the spray booth/curing booth every week (such as through smoke tests). If local airflow disorder is found (such as too low wind speed near the robot), it may be due to local blockage or installation deviation of the filter. The machine needs to be stopped for inspection.
High-temperature protection: For high-temperature resistant filters used in curing rooms, it is necessary to regularly monitor the operating temperature (measure the surface temperature of the filter with an infrared thermometer) to ensure that it does not exceed the upper limit of its rated temperature resistance (such as 180℃), to prevent the softening of the adhesive layer and the shedding of the filter material due to high temperature.
Iv. Standards and Operations for Filter Replacement
When the filter meets the replacement conditions, it is necessary to operate in a standardized manner to avoid contaminating the clean area during the replacement process, and at the same time, properly handle the discarded filters.
1. Timing of change determination (meeting any one of the conditions is acceptable)
The running resistance reaches twice the initial resistance.
The filter has been in use for more than 12 months (even if the resistance does not exceed the standard, the filter material may still experience efficiency decline due to aging).
PAO leak detection revealed that the filter material was damaged (and could not be repaired).
The frame is severely rusted and the sealing rubber strips have aged and failed.
2. Change the operation process
Shutdown preparation: Turn off the supply air fan and cut off the relevant power supply. Lay dust-free cloths around the installation area to prevent dust from falling during disassembly.
Old filter removal: Loosen the pressure strip bolts and remove the pressure strip. Wrap the old filter with a dust-free bag (to prevent the dust on the filter material from spreading), remove it from the static pressure box, and hand it over to a professional institution for treatment as hazardous waste (if it has adsorbed coating VOCs or harmful dust).
Installation area cleaning: Thoroughly clean the accumulated dust and residual rubber strips in the static pressure box and installation frame with a vacuum cleaner. If necessary, wipe the sealing surface with alcohol.
Installation of new filter: Repeat the “Standard Installation Process”. After installing the new filter, conduct a PAO leak test again. Only after passing the test can the system be started.
|
Q&A |
Cause of occurrence | Avoidance plan |
| There is air leakage after installation | The sealing gasket was not compressed properly and the pressure strip bolts were not tightened evenly | Use “diagonal tightening” bolts. After installation, PAO leak detection must be carried out |
| The resistance rose too rapidly | The medium-efficiency filter at the front end was not replaced in time and the air volume exceeded the rated value | Replace the medium-efficiency filter every month to ensure that the air volume matches the rated value of the filter |
| The filter material is damaged | During installation, there may be collisions, excessive air flow impact, and high-temperature aging | Handle with care during installation. Install an air flow distribution plate and select compliant high-temperature resistant filter materials |
| Rust on the frame | The environment is humid and the frame material is not corrosion-resistant | Aluminum alloy frames are selected and drainage devices are installed in damp areas |
| The filter is installed in reverse. | The air flow direction indicator was not paid attention to | Before installation, clearly mark “air intake/exhaust” and have multiple people check it |
The “installation – maintenance – replacement” of high-efficiency filters with separators is a systematic project: the core of installation is “sealing without leakage”, the core of maintenance is “monitoring resistance”, and the core of replacement is “avoiding contamination”. In industrial coating workshops, it is necessary to adjust the operation details in accordance with specific working conditions (such as the normal temperature spraying area vs. the high-temperature curing room), and at the same time establish a regular maintenance system. Only in this way can the filtration efficiency be maximized, the coating quality be stable, and the production cost be reduced.